In this update on our DIY Sprinter Van build we share the key features of our campervan’s kitchen, our van conversion’s cabinet which hides our composting toilet, and our recently-installed LED mood lighting. At this stage we’ve also installed our platform bed that fits into our Flarespace flares, so we can sleep sideways above our van’s garage area (where all our adventure gear is stored and where our adventure dog Kepler sleeps in his crate).
All of our DIY Sprinter van build updates are being shared on our YouTube channel, where you can find our van build playlist with the videos in chronological order – subscribe to the channel to ensure you don’t miss future van build and van life updates 🙂
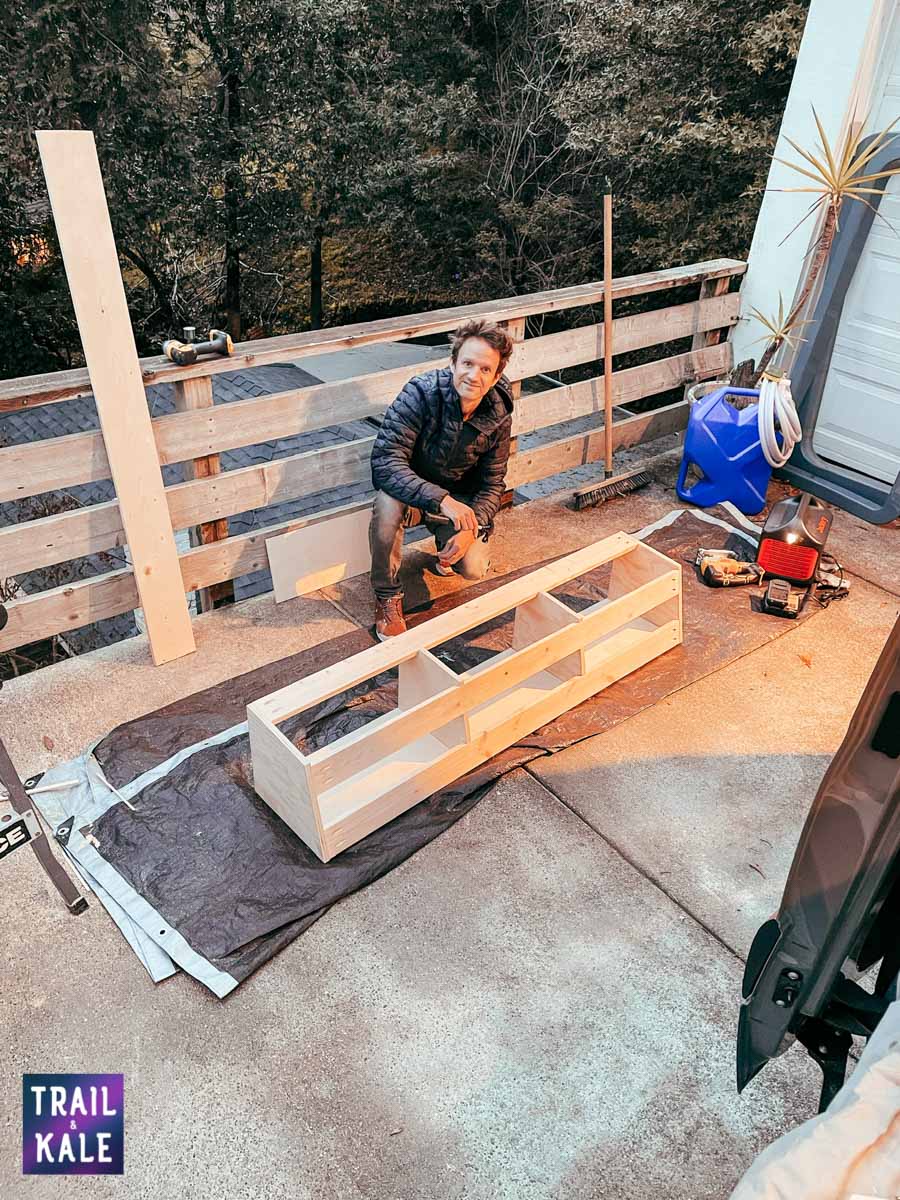
So much of this van was handcrafted by us and as first-time van builders we learned so much along the way, especially when it comes to the van’s cabinets, custom-building everything including our oak countertop, overhead and base cabinets and the storage under our huge bed!
We’ll also be publishing videos explaining the techniques, gear and parts used for different aspects of our Sprinter’s conversion from a cargo van to a luxury tiny home on wheels, including what we did, how we did it and where key products came from, which will hopefully be really helpful for you if you’re also planning to convert a van.
These videos will include details on what we did to install the custom cabinets, Nature’s Head composting toilet, LED lights and oak countertop featured in this van build update.
You can visit our YouTube channel here and read on below the video on this page to see some more photos of our van build and the part 5 van build update video covering the custom base cabinets, where we’ve hidden our composting Nature’s Head toilet, our solid oak countertop and the platform bed.
A look at the cabinets, composting toilet and oak countertop in our DIY van build
Looking for other posts in our luxury custom DIY Sprinter Van build series? Click the button below to see all van build and van life posts:
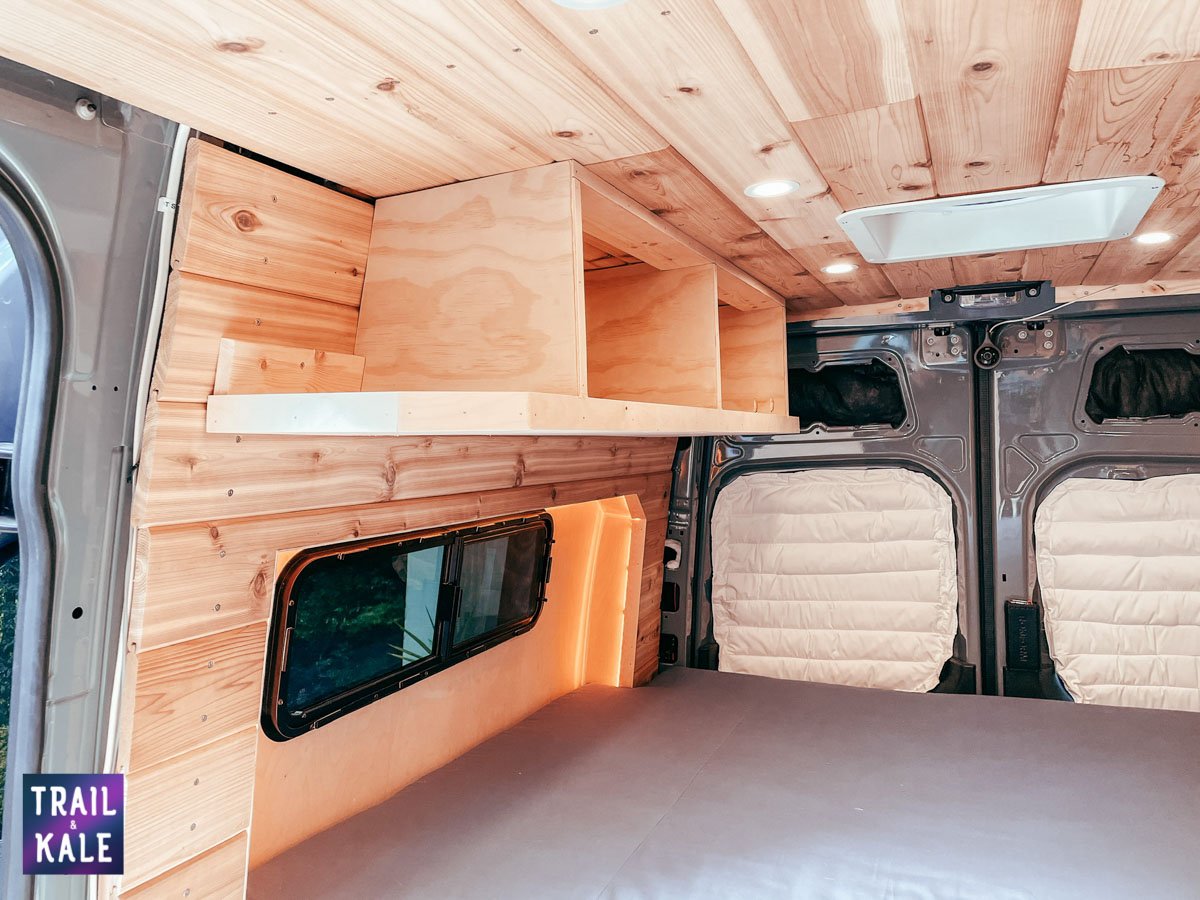
Our Sprinter Van’s cabinets – custom-made with strong pocket-holes, baltic birch plywood and 1×4 wood
This DIY Sprinter van build update shows you an overview of how our van’s custom cabinets are looking before they have doors on and before painting. We made all of these cabinets ourselves to fit perfectly in our desired campervan layout and to maximize space within the van. When you have a small (144 wheelbase) Sprinter van to build out, space is truly at a premium so we have done everything we can to make the most of it. Click here to jump down to the image gallery with more pictures, watch the video for a better look at how it looks in ‘real life’, and read on for an overview of what we did.
Weight is also a consideration when planning a DIY van build, as the weight of the wood and other materials you use can make a difference – both in terms of the total weight of the van, as well as the distribution of weight within the van – balancing it between the driver and passenger side, front to back, and height of the van. We’ll share more on how we planned our van build’s weight distribution in a future post.
Designing van conversion cabinets
The hardest thing about designing and planning cabinets in a van conversion is working with the shape of the van’s walls and ceiling, which curve. Fortunately, the walls are pretty straight at the bottom of the van so this was less of a challenge for installing the kitchen cabinets, but when it comes to the upper cabinets we made templates out of leftover foam and cardboard to help us cut the right shape wood to fit the angles of the walls and ceiling.
Related Reading:


In order to secure the van’s cabinets to the walls, we pre-planned and installed a combination of furring strips that are screwed to the van’s walls with self-drilling screws, and an overlay of strong Baltic Birch plywood (1/4 inch thick) to give us a larger surface to which to attach our van’s cabinets. Where possible, we screwed the cabinet structure directly through the plywood into the furring strips.
Another key consideration when designing cabinets for a campervan is whether you’re going to build in a kick-space like you would have in a regular kitchen in a house. These toe-kick areas help in a few ways – they stop you stubbing your toes on the cabinets when you open the doors, they allow you to comfortably stand closer to the cabinets (useful if you’re using a sink or cooking) and they make it easier to open the doors without the bottom scraping on your van’s floor. But… you do want to make sure you use that space so that it’s not wasted!
In our van build kitchen we have three cabinets in the base unit – the left has a base which contains electrical cable from our fridge and heater back to our house batteries and fuse box, the center contains our sink’s gray water tank and so it does not have a base so we can use that space, and the right is intentionally left empty, with holes drilled in the back and sides, so that our fridge gets enough air to do its job. We also left sufficient space behind the fridge cabinet to help with the ventilation – as it can’t work if there is no way of it drawing in fresh air and blowing out heat – and this had to be planned in at an early stage in the build.
The wood we used in our Sprinter van’s cabinets
The wood we used for our DIY van cabinets was mainly a combination of baltic birch plywood and pine 1x4s.
Unfinished pine 1x4s were perfect for using with the pocket jig (explained below), and strong enough for our van’s cabinets. We built the cabinet and door frames using the 1x4s. For the dividers, bases and door panels we used our favorite Baltic Birch Plywood – in the 6mm (around 1/4 inch) thickness. Baltic Birch plywood is different from regular plywood – it’s better quality and holds screws well – it also looks good and is easy to paint. We used an even thinner Baltic Birch plywood – the 3mm / 1/8 inch thickness – for our cabinet’s faces, which hide the exposed edges and joins between the various pieces of wood used to make the cabinet frames.
The dividers you see in our van build videos and photos (between the kitchen and bed, and behind the driver and passenger seats) also use cedar 2x2s for the vertical portions. Cedar is the same wood as we used for the tongue-and-groove walls and ceiling, which is explained more in our DIY Sprinter van build part 4 update.
We used our Kreg pocket hole jig to make our van’s cabinet joints as strong as possible
In a DIY van build you want the cabinets to be particularly strong – even more so than in a house, given that your van is going to be moving and all that movement and vibration can affect the integrity of anything you build inside your van. Having cabinets that aren’t well-constructed can also mean they start to squeak and creak with movement. With that in mind, we chose to use the strongest method for joining the wood in our van’s cabinets together – that we could do quickly and easily with no prior woodworking experience.
I’m sure there are other even stronger woodworking techniques out there, but the beauty of using our Kreg pocket hole jig setup is that it is super-quick and easy to get the hang of. Essentially, the jig provides a way of consistently pre-drilling, and then screwing, joints together through the end of one piece of wood into another. It comes with a special drill-bit, screws and driver bit and a guide so you get the depth and angle of the holes right.
We don’t show us using it in this brief van build update, but as this was such an important tool for our van build we’ll be making another video demonstrating how we used the Kreg jig in our build, and feel free to ask us a question in the comments on this post, too.
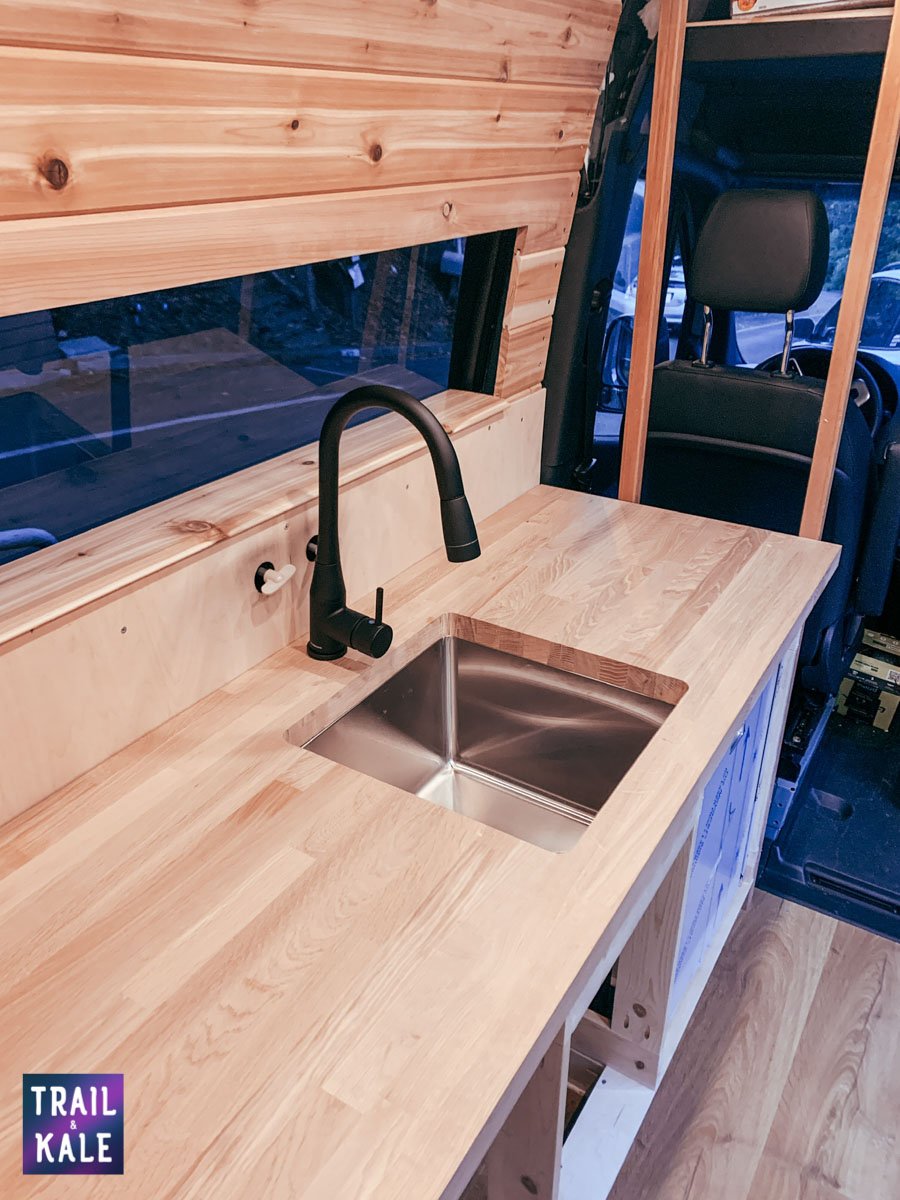
Cutting and installing an oak countertop in our campervan
Once the oak countertop went in our van really started to feel like a camper! We bought a solid oak countertop and cut it to size ourselves, which included cutting holes for the undermount sink and faucet.
When we bought our countertop we had not yet invested in our table saw, so we cut the length and depth to size using our trusty jigsaw. A table saw would have been much quicker and easier to get straight lines, but we are fortunate in that Alastair is pretty damn good with the jigsaw and the lines came out nice and straight.
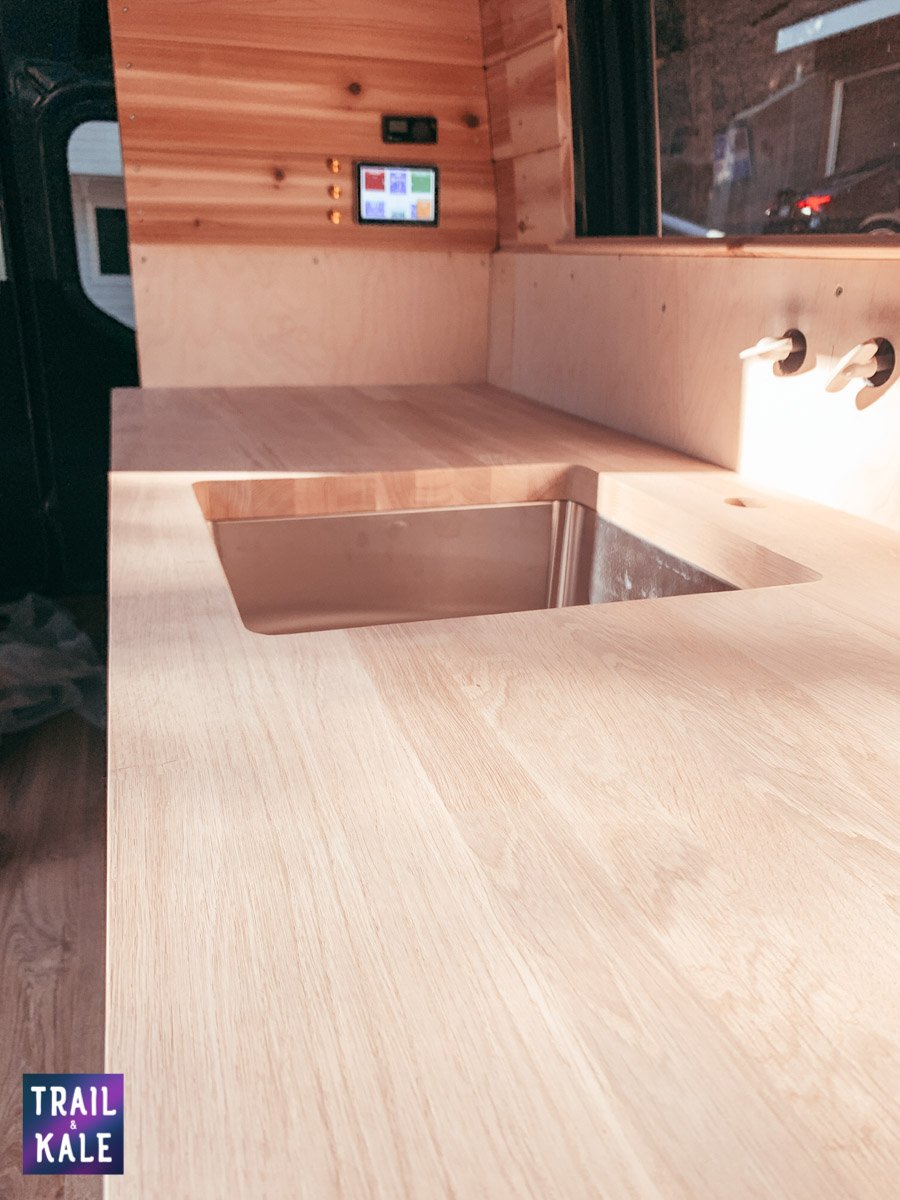
We used a hole saw to cut the faucet hole, and the jigsaw again to cut a hole for the sink. As we were undermounting our sink, we had to be super-careful to cut the hole neatly, as the raw edges would be on display in our van. If you’re using a drop-in sink then this would be less of a concern.
Once all the edges and holes were cut and sanded (using an orbital sander) we applied several layers of polyurethane coat to protect and seal the wood. This really brought out the gorgeous color of the oak while also protecting it from water, dirt and damage that are inevitable in a camper.
Installing a composting toilet in our Sprinter van
Related Reading:


In the DIY van build video update we share a peek at our composting toilet! Having a toilet in our campervan was a must-have for us, and we didn’t want a chemical toilet. Composting toilets are awesome and don’t have that chemical smell that comes with a porta-potty. It did require some installation as we needed to drill a hole underneath the van to run the toilet’s vent hose through.
This also required some planning when it came to the location of our toilet within the van – it is intentionally located above the sliding door step as this was a straightforward place to drill a hole in the van without going down through our van’s flooring and insulation. More to come on that in a subsequent video…
Installing custom cabinetry in our Sprinter van build – image gallery


Off-Grid Sprinter Van Build Next Steps
Our van build is coming together in this update and there’s a load more progress that we share in the next update on our Sprinter conversion (PART 6!), including our van’s HUGE bed, custom mattress, custom blackout insulating window shades and recessed LED mood lighting!
DIY Sprinter Van Build Series on YouTube
To watch the whole DIY van build series and subscribe to our YouTube Channel for more videos, click the button below to head over to our van build playlist: